Tablature (TAB)
For those who haven’t yet learned to read standard notation, I include a tablature (TAB) staff with all the music examples and exercises on the website and in the books. TAB is a popular way of showing guitar players where to play notes on the fretboard.
The TAB staff is based on six horizontal lines that represent the strings of the guitar.

The orientation of the lines are the same as if you lay a guitar neck on its side:

The bottom line of the TAB staff represents the low E-string with each higher line representing the A, D, G, B, and high E-strings, respectively.

This orientation will seem upside down at first, but you’ll quickly get used to it.
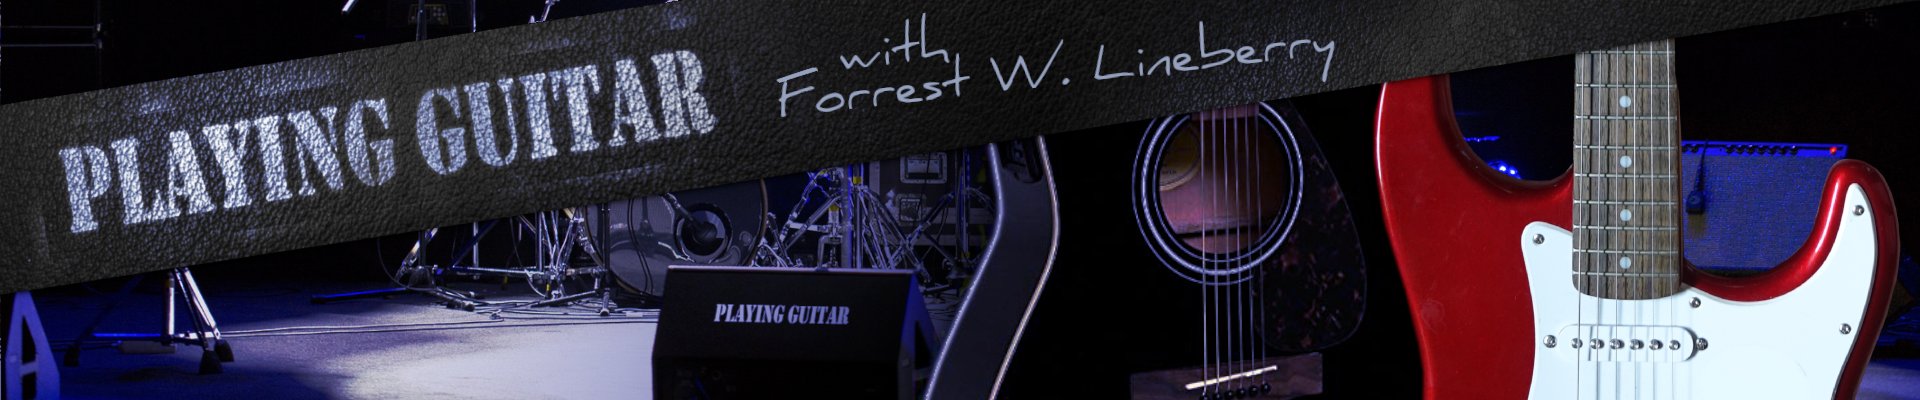
Numbers are written from left to right on the lines to show which fret to play. individual numbers across the lines are single notes played in succession:

Listen:
Numbers stacked vertically on the lines represent chords and are played at the same time:

Listen:
When TAB and standard notation are used together, each number on the TAB staff corresponds with a note on the standard notation staff directly above.
If you have have at least a basic ability to read standard notation, that staff will provide the rhythm and timing for each example. If you have yet to learn standard notation, you’ll need to listen to the included sound files to hear the rhythm and timing of each example.
Fretboard Diagrams
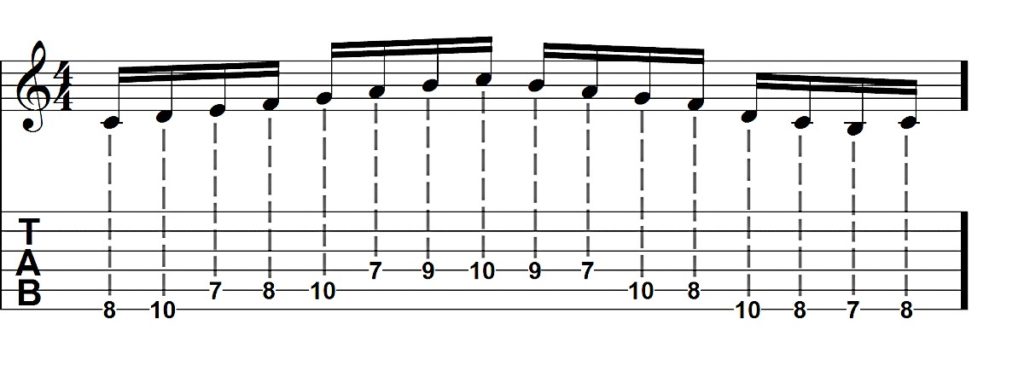
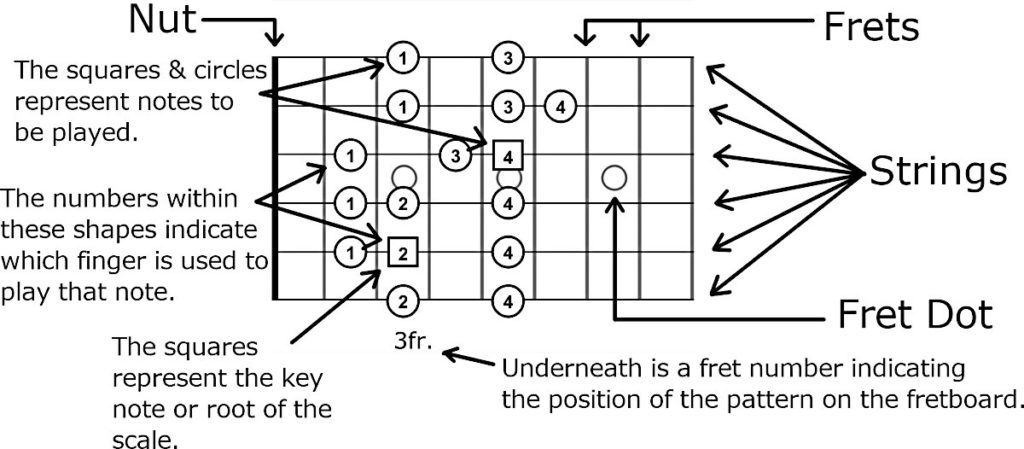
A Fretboard diagram is a line drawing of the guitar fretboard:
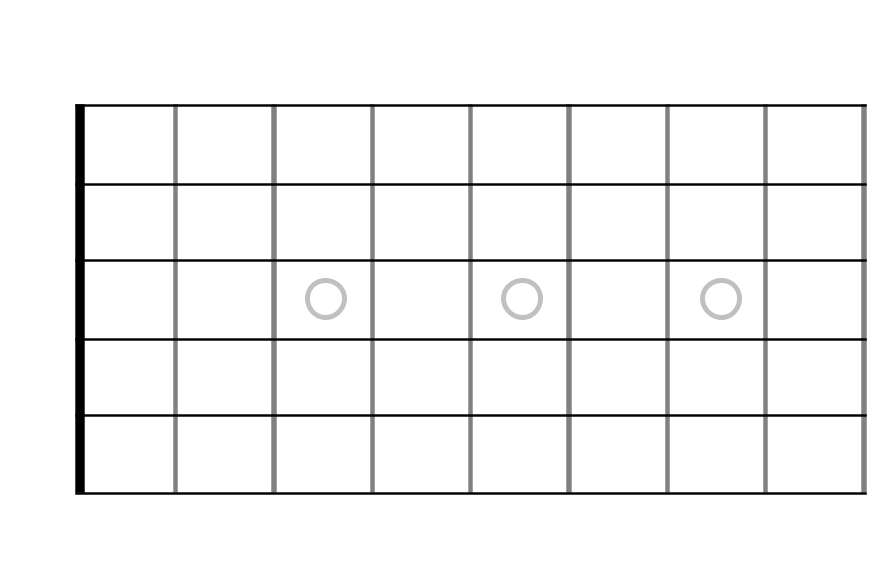
These diagrams are used to show patterns of notes on the fretboard:
Just like with TAB, the horizontal lines represent the strings with the same bottom-to-top orientation (E A D G B E). The vertical lines represent the frets. The bold vertical line on the left (when present) represents the nut—the plastic, graphite or bone piece the strings pass over at the end of the fretboard. Squares, circles and other shapes are used to represent notes to be played. The Square is generally reserved for the root of a chord, scale or arpeggio and circles generally used for the remaining notes. Letters and numbers can be used within these shapes to indicate the name of the notes being played, which fingers to use and other information. The section of the fretboard that the diagram represents will usually be indicated with fret numbers placed along the bottom edge of the diagram.
Chord Diagrams
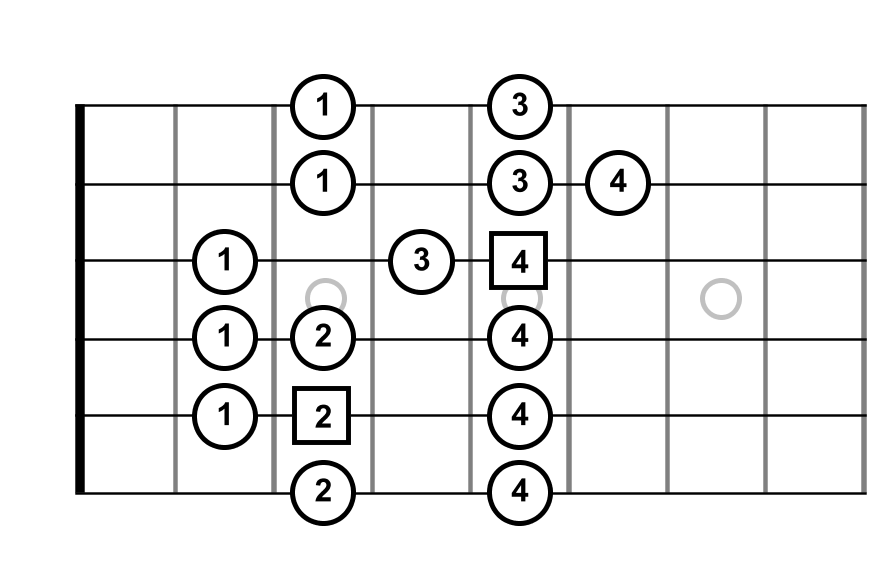
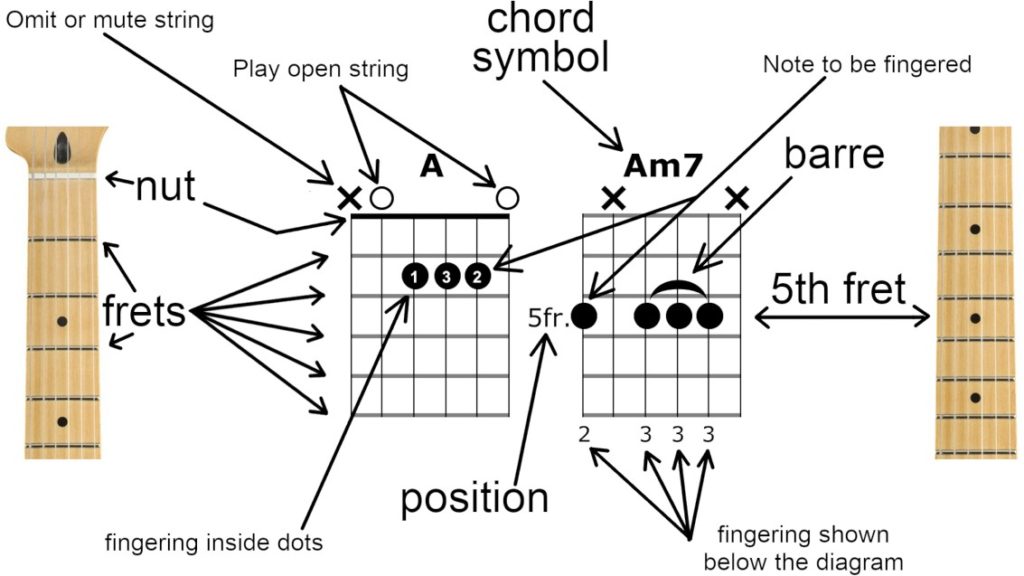
Chord diagrams are just like neck diagrams. The only difference is that the picture is rotated so that the vertical lines represent the strings and the horizontal lines represent the frets:
![]()
Once again, dots are used to indicate notes that need to be held. The fingers needed to hold the notes are either indicated inside the dots or along the bottom of the diagram. X and O symbols are used along the top of the diagram to indicate any strings that need to be omitted from the chord (X), or played without pressing them down to the fretboard (O). This is called an open string. For chords played higher up the fretboard, a position indicator (5fr.) will be put beside the main fret of the chord shape. Some chords require that you lay one finger across multiple strings. This is called a barre and is indicated with curved line over the notes that require the barre. Lastly, the entire affair is topped with a chord symbol. The chord symbol is the chord’s name in an abbreviated form.
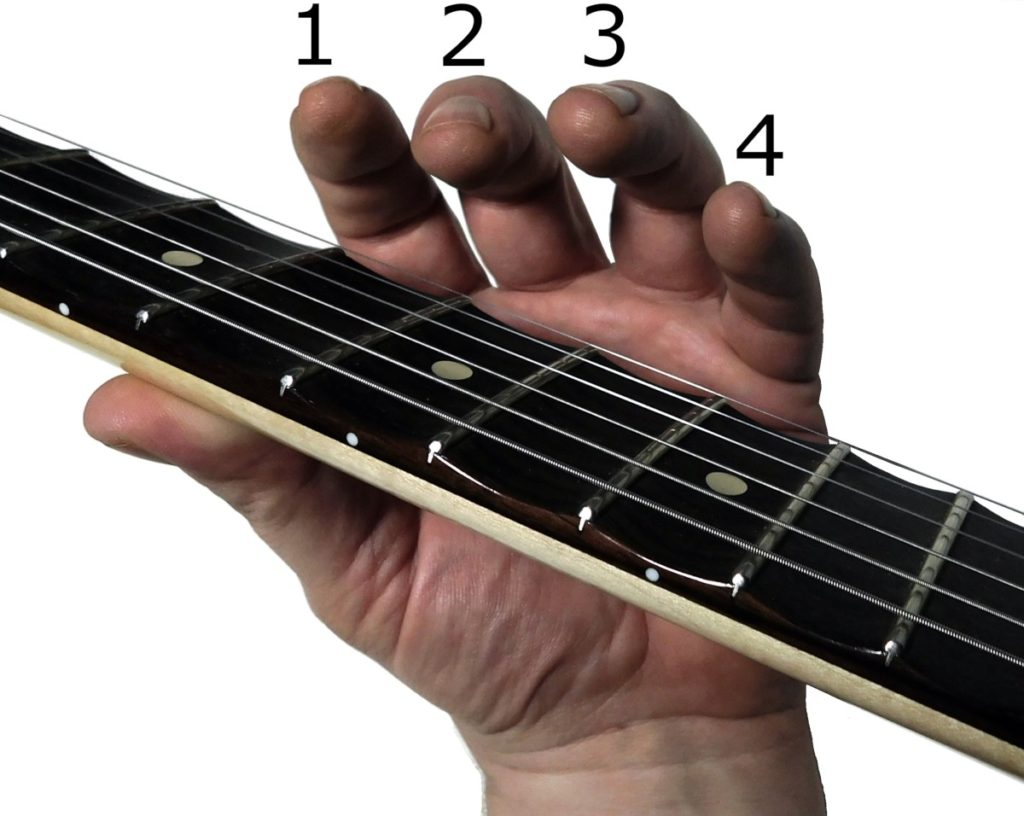
Finger Suggestions
In some musical examples, you’ll find finger numbers written next to the notes in the standard notation staff. These are used in conjunction with the TAB to help guide you in choosing how to finger potentially awkward or difficult note combinations.